As well as manually placing controls, it’s possible to import controls from other sources:
- OpenStreetMap data
- OpenPlaques
- GPX file waypoints
OpenStreetMap data
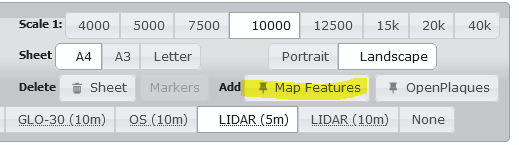
For OpenStreetMap data, click the Add Map Features button:
This brings up the following dialog box, with lots of options:
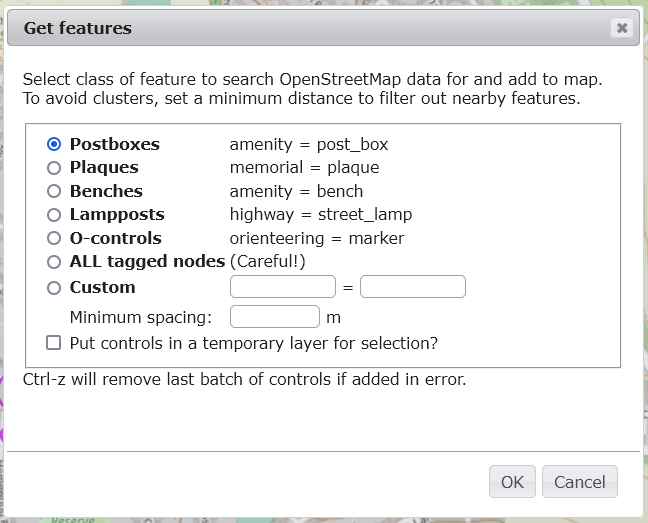
First, pick what you want to use.
- Postboxes – this differs from oomap.co.uk as it brings back postboxes from OpenStreetMap rather than dracos.co.uk. Why? This gives global rather than UK-only coverage and is much more up-to-date, but is much more incomplete – if you want to use an unmapped postbox you’ll have to add it to OSM first!
- Plaques – historical plaques in OSM.
- Benches
- Lampposts
- O-controls – see the OSM wiki for how to tag permanent orienteering courses; once tagged these can be imported here.
- ALL tagged nodes – this will import every OSM node (i.e. a point, rather than an area) that has been tagged in your map. This will be a lot of points for most urban areas! See “using a temporary layer” below as a way to pick and choose from this list.
- Custom – if you know which OSM tag and value you want, you can manually enter it here. eg. “natural” = “tree” will import trees, “highway” = “crossing” will import road crossings.
For each of these options, the import will also try to bring back a useful description of the feature, e.g. “Postbox:AL1 33”, “Lamppost: 12”.
The Minimum spacing: input allows a distance in metres to be specified – only features further away from all other previous features than this distance will be imported. This is useful for dense features or if you want to de-duplicate clusters of features.
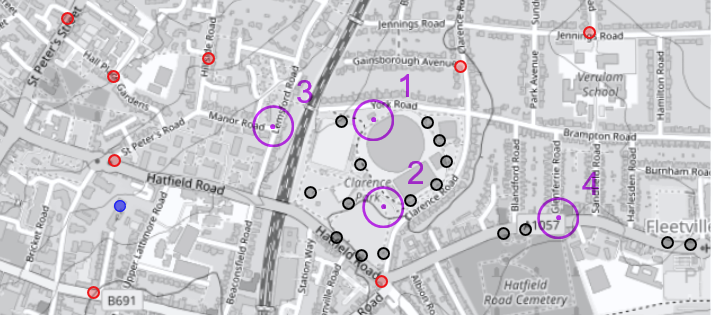
“Put controls in a temporary layer for selection?” – if selected, this doesn’t import the selected features into the map as controls. Instead, it brings them in as temporary features, labelled as small circles (colour-coded depending on what feature you selected). For example:
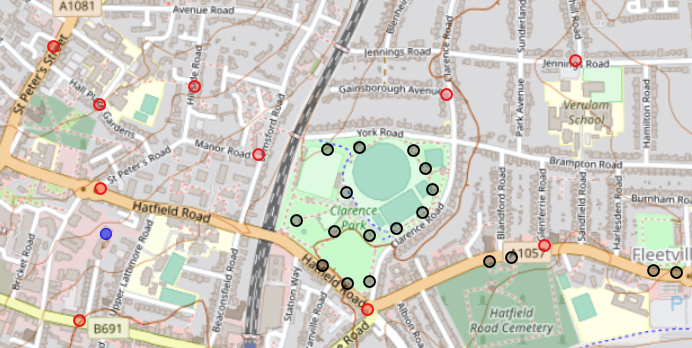
You can then select features to promote to control sites by double-clicking on the small circles. Hovering over the circles will show a tool-tip with more details.
To remove the remaining temporary markers, click the “Delete markers” button in the top panel.
If you accidentally bring too many features onto the map you can reverse each previous import one at a time by pressing <Ctrl>-Z.
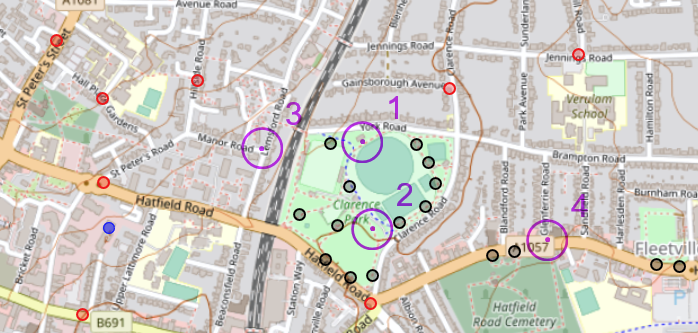
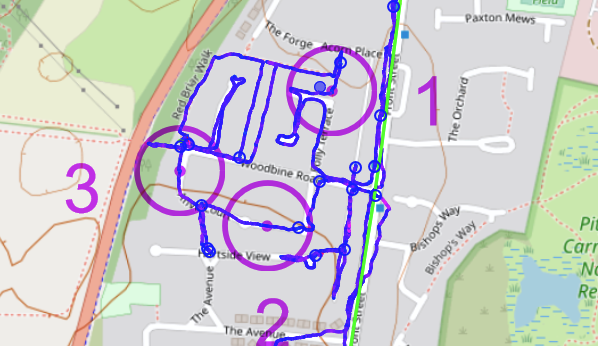
If you find it difficult to see the markers against the map background, pressing <Ctrl>-G will toggle a greyscale map where markers are more obvious:
Openplaques
This imports any plaques found at openplaques.org and adds them as controls.
GPX file waypoints
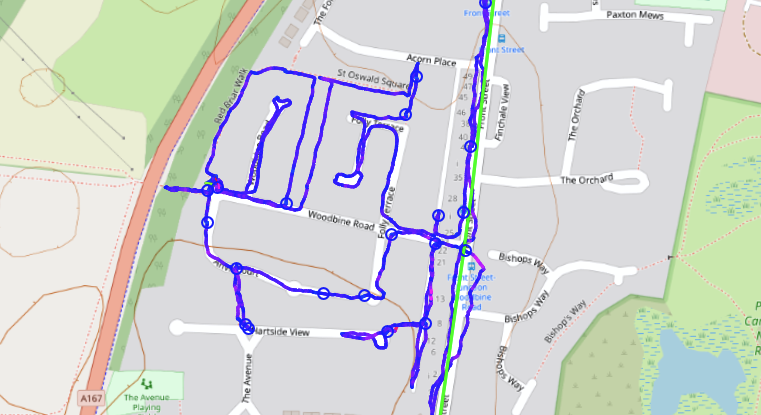
Dragging and dropping a .gpx file that contains waypoints (with or without tracks) will import these into a temporary layer:
Double-clicking on a waypoint will promote this to a control site:
GPX tracks are coloured by relative speed so it is easy to see where you slowed down or stopped, and you can manually place controls at these sites as appropriate.